Purpose
This page will explain how to create an online web map
Requirements
- You will need to have a username and passowrd set up for you by a Cadasta team member. If you do not have a user please contact support@cadasta.org
- You will need to sign to your account - see Introduction to your account for a reminder.
Tips
Steps
Add a Basemap
Navigate to ArcGIS Online (AGOL) and click Map at the top of the page.
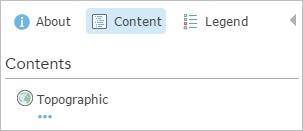
At the top of the Details pane, click the Content button.
- If necessary, click the Basemap button on the ribbon and choose a basemap.
- Save your map. On the ribbon, click the Save button and choose Save.
Add Layers
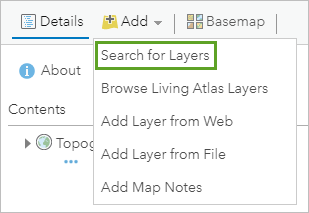
On the ribbon, click the Add button and choose Search for Layer
A default list of search results appears.
If necessary, click the dropdown arrow at the top of the pane and choose ____.
- Type in the search box. You are able to limit the search results.
- In the list of results, locate your search result.
- Click Add to add the layer to the map. You can add as many layers as you would like.
- At the top of the search pane, click the Back button. The layers are drawn, with their default symbols, in the order in which they were loaded into the map.
- Save your map. On the ribbon, click the Save button and choose Save.
Set Layer Properties
- In the Contents pane, point to your layer. Click the More Options button and choose Rename.
- In the Rename window, change the layer name and click OK.
- In the same way, rename each of your other layers.
- In the Contents pane, point to one of your layers. Click the More Options button and click Move up. The layer moves up one position.
- Move the layer to the top of the list.
- In the Contents pane, point to the your layer. Click the More Options button and choose Create Labels.
- Each entity is labeled.
- In the Label Features pane, you can change the label size.
- Open the properties for on of the layers and choose Transparency.
- Set the transparency percentage.
- Save your map. On the ribbon, click the Save button and choose Save.
Define the Map Legend
- At the top of the Contents pane, click the Legend button. Legend entries are created for all layers except the basemap.
- At the top of the Legend pane, click the Content button.
Open the properties for a layer and choose Hide in Legend.
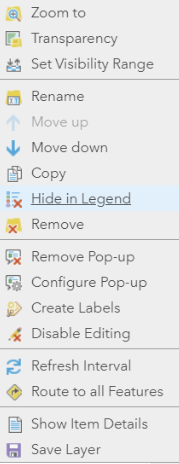
Keep it hidden if you would like.
If you would like to show the layer, then choose Show in Legend.
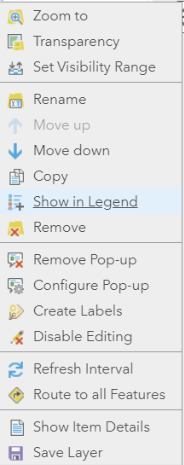
View the legend again to see the effect, and then go back to the Contents pane.
Change a Symbol
In the Contents pane, point to a desired layer and click the Change Style button.

In the Change Style pane, the currently selected style is Location (Single symbol), which is indicated by the check mark.
In this style, all features in the layer are drawn with the same symbol. The Location style is appropriate when you want to see the features on the map but you're not interested in their particular characteristics, such as names or speed limits.
For a drawing style, under Location (Single symbol), click Options.
- Under Showing Location Only, click Symbols to change the symbol.
- On the color palette, choose a color that you think will look good and click OK. The new color is applied to the map. (If you don't like it, click Symbols again to open the color palette and choose a different color.)
- At the bottom of the Change Style pane, click OK and click Done.
- Save your map. On the ribbon, click the Save button and choose Save.
More Information
Esri Resource Links
Notes
- If you're in a new session, clicking Map will open a new map. Otherwise, it will open an existing map (the last map you were using). If an existing map opens, click New Map, and choose Create New Map.
- If you save the map, the map extent at the time of saving will become the extent used by the Default extent button. It can also be useful to add spatial bookmarks to navigate to particular map locations.
- Layer properties are always accessed in the same way: by pointing to the layer name and clicking an appropriate button or clicking the More Options button and choosing the property you want to change.
- The usual practice is to put points above lines, and lines above polygons. Points, lines, and polygons are all feature layers: they usually represent discrete geographic objects that have more or less precise locations and boundaries.
- Tile layers are images and cannot be manipulated in the same ways as feature layers. They typically represent large, continuous surfaces rather than discrete objects. Tile layers cannot be moved above feature layers in a map.
- When you start a new map, or open one of your own saved maps, it opens with the Contents pane showing. When anyone else opens a map created by you, however, it opens with the Legend pane showing.
- A layer's default display settings, including its style and pop-up configuration, are made by its owner. Once you add a layer to your own map, however, you're free to change those settings.